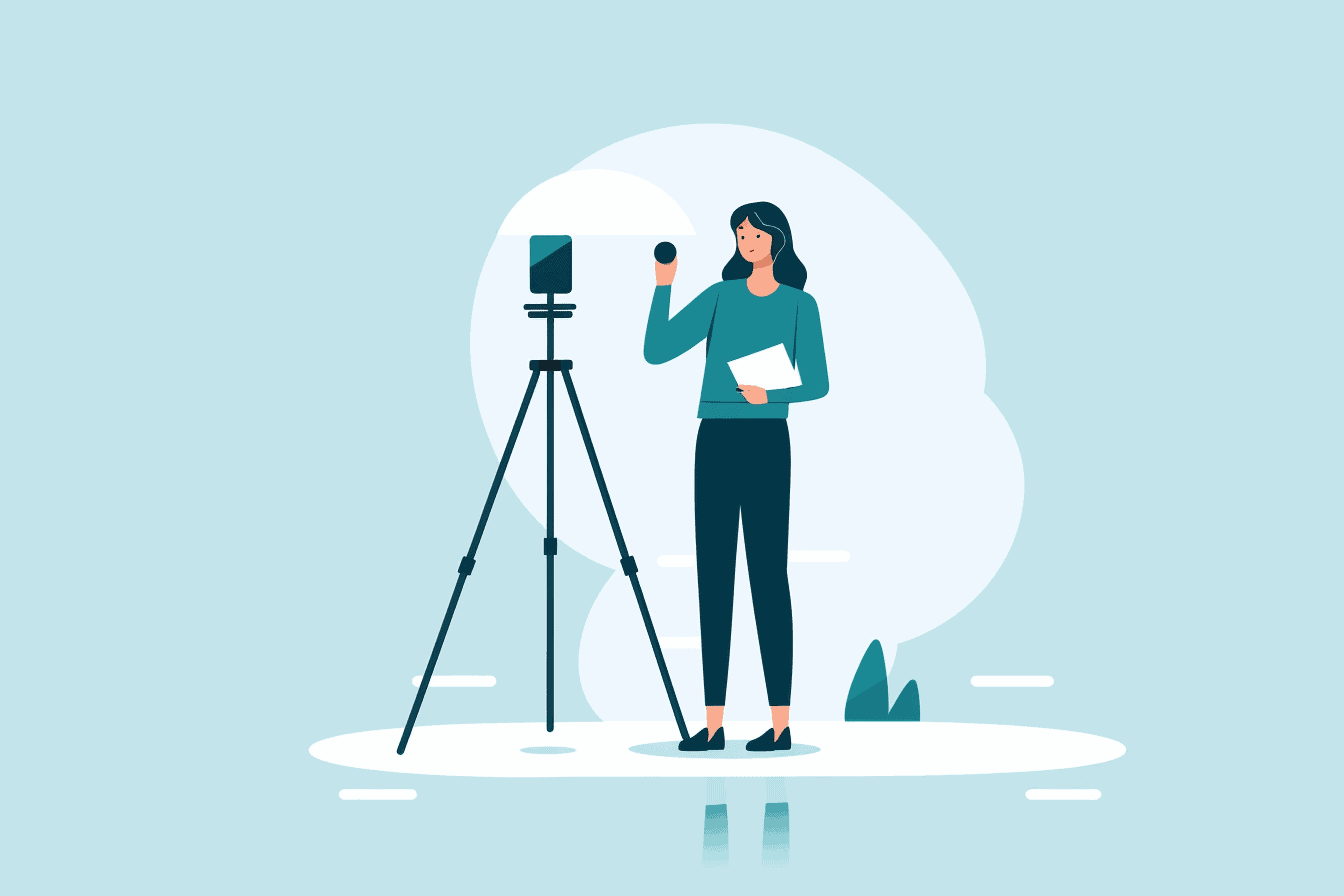
How to Take Your Own Headshot in 7 Simple Steps
In the era of digital dominance, a professional headshot isn’t just a fancy add-on—it’s a must-have. Be it your LinkedIn profile, your company’s website, or your guest blog bio, a quality headshot is key to creating that first impression that screams ‘pro’!
But let’s face it, getting a professional photographer to do the job can be a hefty expense and quite a hassle in terms of coordination.
So, how about switching gears and capturing your own quality headshot? Sure, the end result may not be an exact match to what a professional could offer due to environmental and equipment constraints, but with some savvy tips and tricks, you can get pretty close.
Think it’s too tough? Think again!
With this blog post, you’ll get a seven-step breakdown to take a professional headshot that mirrors your professional persona – cost-effective and good enough for that LinkedIn profile.
And if you’re curious about exploring other cost-effective alternatives, you might want to check out AI solutions like Aragon AI that can whip up a professional headshot in no time.
No confusing jargon, no needless fluff – just clear, actionable advice that’s easy to digest. So, ready to step behind the lens and create your own headshot magic? Let’s dive in!
Step 1: Setup Your Environment
Choosing the Right Location
Your professional headshot is an extension of your professional life, so the location you choose to take your own headshot holds significant importance.
Search for a location with a plain background, ideally a solid colored wall. It could be in your home or outdoors, but the key is simplicity.
Complex backgrounds can distract from the focal point, which is you. Skin tone can also be a consideration in choosing the color of your wall.
Aim for a color that contrasts well with your skin, but avoid overly bright or patterned backgrounds. Experiment with different angles and distances from the wall – a bit of depth can add a professional touch to your DIY headshots.

Lighting Considerations
Lighting is a crucial element in photography, and more so in capturing a headshot that stands out. Now that you have chosen an ideal location, let’s dive into understanding the role of lighting in enhancing your photo’s overall quality.
- Natural lighting: This should be your go-to light source. Look for a location saturated with ambient light. Avoid bright sunlight as it may cause harsh shadows and distort your features. On the other hand, indirect sunlight, preferably filtered through a curtain or a semi-transparent material, can create a soft, flattering light similar to professional studio lighting.
- Indoor lighting: When shooting indoors, if natural light is not sufficient, a ring light can serve as an excellent alternative. However, ensure to turn off any indoor lights. These could create sharp shadows or overhead lighting, detracting from the quality of your headshot.
- Camera adjustments: Learn to tweak your camera settings according to the light conditions. Even smartphones, especially with their portrait mode feature, can output impressively good self-portraits when manipulated correctly.
- Experimentation: Try taking multiple shots at different times of the day to discover which lighting works best for your DIY headshots.
Once you have the lighting sorted, you can then concentrate on the specifics of the shot itself.
Step 2: Use the Right Equipment
What Kind of Phone Should You Use?
Alright, let’s talk about the kind of phone you should use for taking a great headshot. We recommend a high-quality phone like an iPhone, Google Pixel, Samsung, or any smartphone that boasts a camera with a high resolution, preferably one that was released in the past three years.
This ensures that you have a device capable of capturing professional headshots, akin to those taken by professional cameras.
The camera settings on these phones are often designed to replicate professional photography and can produce great photos. Keep an eye on your camera lens too; a clean, unscratched lens is crucial for capturing clear shots.
Equipment Limitations: Phones may have limitations for capturing headshots due to a lack of control over lighting and lens quality.
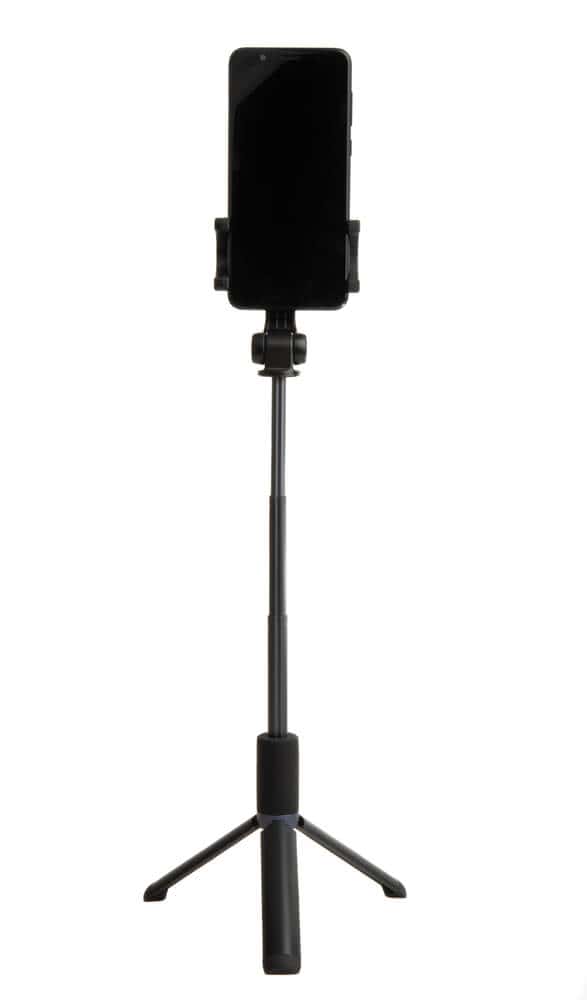
Use a Tripod with Self-Timer, Remote Shutter or Recruit Help
Now, you might be wondering why we don’t recommend a selfie. While selfies are great for casual shots, for a professional headshot, you’d want a higher level of control over the camera angles and stability – something a selfie can’t provide.
Instead, consider using a tripod – it’s your best bet for steady, professional photos. If a tripod isn’t an option, you could use a steady surface or even recruit a friend to lend a hand.
With a tripod, you can try different angles and use self-timer for more control. A remote shutter is another valuable tool that enables you to take your own headshot without having to run back and forth to your camera.
Step 3: Dress to Impress
Choosing the right outfit for your headshot is more than just a fashion decision; it’s an integral part of presenting a professional image.
What you choose to wear can have a significant impact on the final result, potentially conveying aspects of your personality, job role, and even company culture.
Read more detailed tips for professional headshot attires here.
Men

What to Wear
Choose attire that reflects your professional life: a business suit is ideal for corporate roles, while a smart casual outfit works for creative or casual industries.
Ensure the clothes fit well and are clean and wrinkle-free. Solid colors work best; complex patterns can distract from your face, the main focus of your headshot.
Skin
Make sure your skin is clean and moisturized. If you have dry skin, a light moisturizer can prevent a flaky appearance. Oily skin? Use oil-absorbing sheets before the photo shoot.
Hair
Your hairstyle in a professional headshot should reflect your usual style, but it should be neat and controlled. Wash and style your hair the way you normally would for an important meeting or job interview. For longer hair, ensure it’s not covering your face.
Facial Hair
Keep your facial hair neat. If you usually have a beard, trim it to look its best. If you’re generally clean-shaven, a fresh shave will ensure a crisp, professional look in your own headshot.
Women

What to Wear
Your attire should reflect your industry. A business suit or blouse in solid colors are effective choices. Avoid clothing that’s too flashy or patterned; the focus should be on your face, not your clothes.
Skin
Ensure your skin is clean and moisturized. Use a foundation that matches your skin tone to create a smooth canvas.
Hair
Style your hair as you would normally for work. It should look neat and professional. If you plan to get a haircut or color, do it at least a week ahead to give it time to settle.
Makeup
Opt for a natural look. Use a light hand with makeup, highlighting your features without overpowering them.
Jewelry
Keep jewelry minimal and non-distracting. Simple earrings or a delicate necklace is sufficient.
Step 4: Frame Your Shot
Head and Shoulder Framing
Once you’ve taken note of your expression and managed to capture the right lighting, it’s time to frame your shot.
The best professional headshot is usually a head and shoulders shot, placing focus on your face. While it’s important to experiment with different angles, a head and shoulder framing keeps things professional and balanced.

Importance of Eye Level Phone Height
The height of your phone or professional camera plays a pivotal role in framing a good headshot. Elevate the phone to your eye level.
This is crucial for maintaining the accurate proportions of your features, and it helps you avoid creating harsh shadows. It also gives a direct, engaging feel to your photo which can be missing if the phone is positioned too high or too low.
Step 5: Strike a Pose
You’re nearly there – it’s time to strike a pose that communicates your professionalism and confidence.
Body Positioning
Body language is a powerful communicator, and the right pose can say a lot about you. For your professional headshot, stand up straight to convey confidence.
Position your body at a slight angle to the camera – it’s a flattering position that adds depth to the shot. Remember, your shoulders should be relaxed as well.
Now, don’t forget about your arms and hands. They can sometimes feel awkward in photos. Try placing one hand in your pocket or lightly on your hip. This will give your hands something to do and helps to create a more natural posture.
Facial Expressions
Striking the right facial expression is crucial for a good headshot. This is your chance to show your personality.
Aim for a natural, genuine smile that reaches your eyes – this can make your photo feel warm and inviting.
Take note of your eyes – they’re a key part of your expression. Aim for a soft, natural gaze.
Step 6: Click and Review
Taking Multiple Shots and Experiment with Different Outfits
In the quest for a quality headshot, variety is key. Change your outfit a few times during the photo shoot to offer a range of looks for your professional life.
This gives you options and helps you assess which style works best for your own headshot.
How Many Photos Should You Take?
Aim to capture at least 20-50 shots per outfit. This may seem excessive, but remember you’re searching for that one perfect image, and it’s far better to have a broad selection to choose from.
The beauty of a DIY professional headshot session is you control the pace and can experiment with different angles and camera settings without time pressure.
The Importance of Using the Front Camera
For professional headshots, it’s best to avoid using the selfie camera on your mobile device. The back camera typically offers much better resolution and produces clearer, crisper images compared to the front-facing camera.
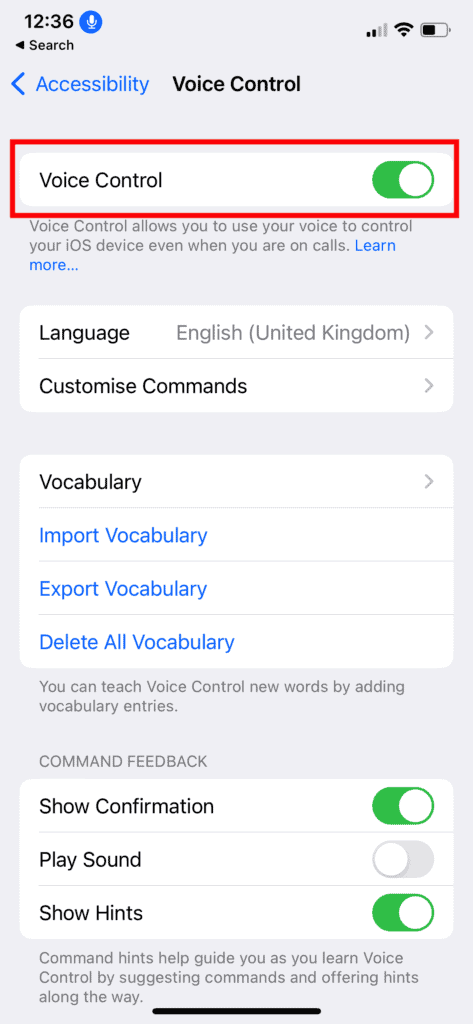
Pro Tip for iPhone: Voice Command
The iPhone Voice Command feature has been an absolute game-changer for me, especially when it comes to taking multiple photos without the use of a self-timer.
This function is especially helpful when you’re alone and want to capture several shots in succession.
Here’s how to use this feature:
- Go to ‘Settings’ on your iPhone.
- Scroll down to ‘Accessibility’ and tap on it.
- From the options, select ‘Voice Control’.
- Then, navigate to ‘Customize Commands’ -> ‘Create New Command’.
- You’ll be prompted to enter a phrase that will trigger the command – this can be anything you find easy to say. For me, I chose the phrase ‘take photos’. However, a common choice is also ‘cheese’.
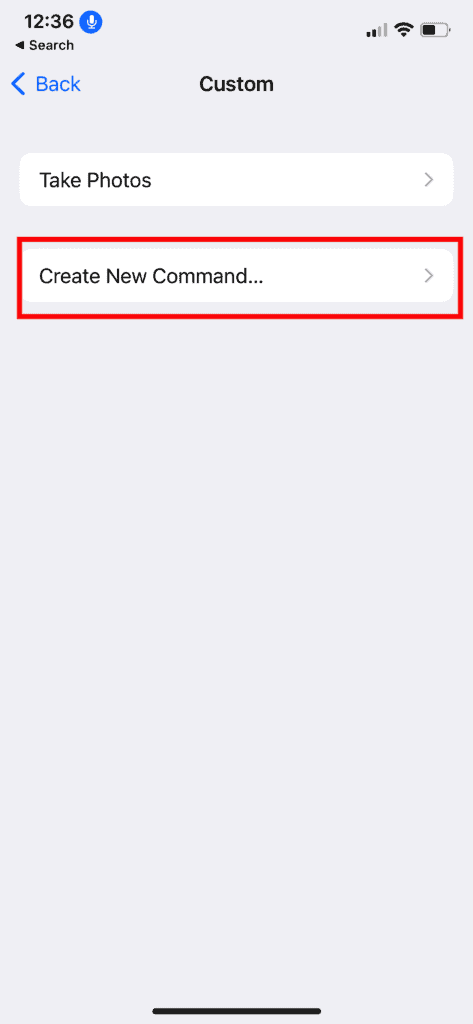
- Once your trigger phrase is set, click on ‘Run Custom Gesture’.
- Now, you will need to press a few times on the button where you usually take photos. It’s important to leave a second or two between each press – this will give you time to switch poses between each photo.
- Click ‘Save’ to preserve your new custom voice command.
Now, your photoshoots can be easier and more dynamic. Just open the camera app, say the trigger phrase, and your iPhone will automatically capture the shots, giving you ample time to change poses and experiment with different looks.
Step 7: Enhance Your Image with Editing
Creating a professional DIY headshot doesn’t stop at taking the picture; editing is an essential step that can elevate the quality of your image significantly. Here are some key points to remember:
Basic Photo Editing Tips
- Consider user-friendly apps like Adobe Lightroom or Snapseed for your photo editing needs.
- Adjust the brightness and contrast to enhance the image’s clarity.
- Aim for true-to-life colors; overly-saturated or vibrant tones can make the photo look unnatural.
- If your photo has harsh shadows from direct sunlight, use the shadows adjustment tool to soften them.
- Utilize the ‘highlight’ adjustment to control overexposed areas.
- Avoid over-editing; the goal is to keep the image clear and crisp.
How to Retouch a Headshot
- Retouching is crucial, and you can use apps like Facetune or Adobe Photoshop Express for this purpose.
- Start with minor adjustments such as removing stray hair or correcting skin blemishes.
- Be cautious about making significant alterations to your facial features – the headshot should still look like you, but on your best day.
- Use the ‘blur’ tool to mimic portrait mode; this tool focuses on the face while subtly blurring the background.
- Ensure that the solid-colored wall or plain background doesn’t distract from your face.
Remember, practice makes perfect. Experiment with different settings until you achieve the look you’re after.
After walking through the series of steps to capture your own professional headshot, let’s summarize the key points to keep in mind.
DIY Professional Headshot Checklist
Pre-Shoot Preparation:
- Select an ideal location: Choose a setting with a simple background and ample natural light. Aim for a solid colored wall or simple backdrop for a professional look.
- Dress according to your profession. Avoid flashy or distracting outfits.
Equipment and Setup:
- Opt for a high-resolution phone or camera released in the last three years.
- Ensure a clean, scratch-free camera lens for clear shots.
- Use a tripod or steady surface for stability.
- Position the camera or phone at eye level for balanced framing.
- Use the camera’s self-timer or a remote shutter for more control over shots.
- Consider using voice command features for hands-free photo capturing.
During the Photoshoot:
- Frame the Shot: Aim for a head and shoulders framing, focusing on your face.
- Use the back camera for better resolution and clearer images.
- Maintain a confident posture with relaxed shoulders and natural arm positions.
- Aim for a genuine, warm smile that reaches your eyes.
- Maintain a soft, natural gaze.
- Capture at least 20-50 shots per outfit to have a variety for selection.
Post-Shoot Editing:
- Utilize user-friendly apps like Adobe Lightroom or Snapseed.
- Adjust brightness, contrast, and colors for a clear, natural look.
- Use retouching apps sparingly for minor touch-ups like stray hairs or blemishes.
- Avoid significant alterations to maintain a natural appearance.
Final Words
Learning how to take your own headshot can be an exciting and rewarding process.
With the right preparation, technique, and patience, anyone can create a stunning headshot that showcases their personality and professionalism. Remember, your photo is often the first impression people will have of you professionally.
So, seize this opportunity to make it count. Start taking those photos and experiment with different settings.
Follow the checklist to ensure you’re hitting all the essential points. You may surprise yourself with the high-quality results you can achieve right from home!