How to Use AI Background Noise Removal Effectively for your Audio Enhancement
So, you’ve finally wrapped up recording your latest video, and it’s almost perfect.
But when you play it back, that pesky background noise—a dog barking, traffic outside, or just the low hum of your computer—distracts from your message.
I get it. Been there myself.
Fortunately, AI noise reduction tools are now more accessible and powerful than ever, making it easier to remove background noise from your videos.
You don’t need to be a seasoned video editor or spend hours tweaking audio settings. AI noise reduction tools are now so advanced that even a beginner can remove background noise with just a few clicks.
In this post, I’ll walk you through how to clean up audio in videos with AI tools as well as the best AI noise removal tools for video audio enhancement. Trust me, these tools will save you tons of time and frustration.
Ready to discover how AI can transform your video noise reduction process? Let’s get into it.
What is AI Background Noise Removal?

First of all, let’s talk about what exactly AI-powered background noise removal is.
It’s all about using machine learning algorithms to clean up your audio recordings by removing unwanted background sounds. These algorithms are trained on massive amounts of audio data to distinguish between the good stuff (your voice) and the bad (background noise).
Now, how does this compare to traditional noise removal techniques?
Well, traditional noise removal techniques often involve fixed filters and manual adjustments, which can sometimes distort the audio or leave behind unwanted artifacts.
AI, on the other hand, dynamically adjusts and refines its approach based on what it learns from your audio. This helps the software tell the difference between annoying background noise and the important sounds you want to hear.
As a result, AI tools can manage tricky noise situations and keep the quality of the main audio much better than traditional methods.
Now that you understand how AI background noise removal works, you’re probably eager to check out the tools that can make your audio editing easier. So, let me show you some top options that can quickly enhance your audio quality.
Top AI Tools for Video Audio Enhancement
As a content creator, I’m always looking for ways to boost my video production quality. One important aspect is getting that professional audio, and that’s where AI audio enhancement tools come in handy. Here are some of the best AI noise removal tools or AI-powered audio cleanup solutions that use advanced machine learning to take your sound to the next level!
Adobe Podcast Enhance Speech

First up, we’ve got Adobe Podcast Enhance Speech.
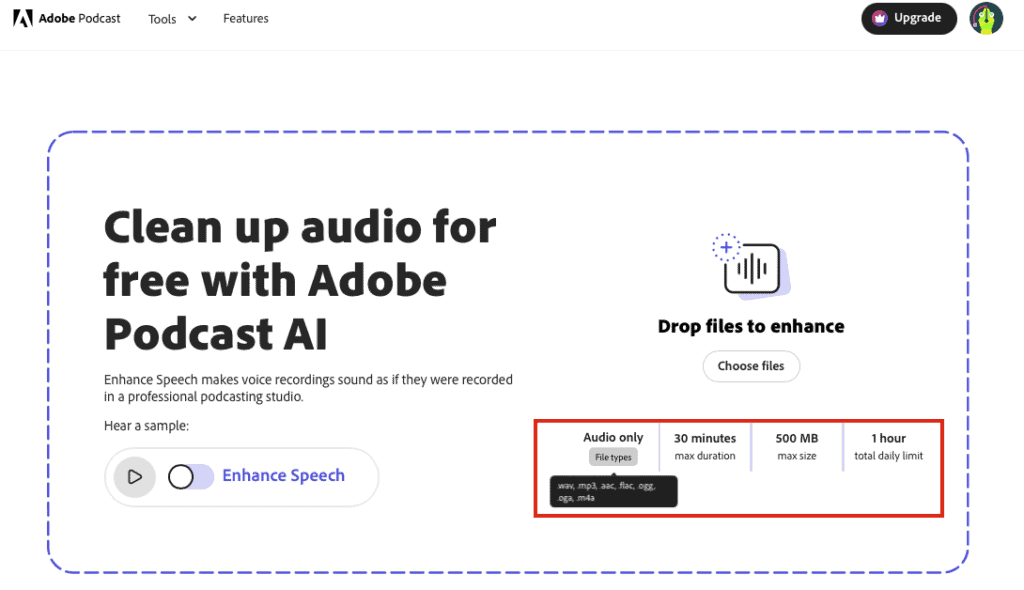
I just listened to a demo audio that showcased its smart noise reduction capabilities, and I was blown away. It cleaned up a noisy audio sample with street noise effortlessly. With just one click, it zaps away background noise, echo, and reverb.
Also, it’s free to use for 30 minutes max duration and 1 hour total daily limit, so I think it’s definitely worth giving a try.
- Pro: One-click enhancement that works like magic
- Con: Occasionally produces slightly robotic sound
- Price: Currently free (may change)
Descript
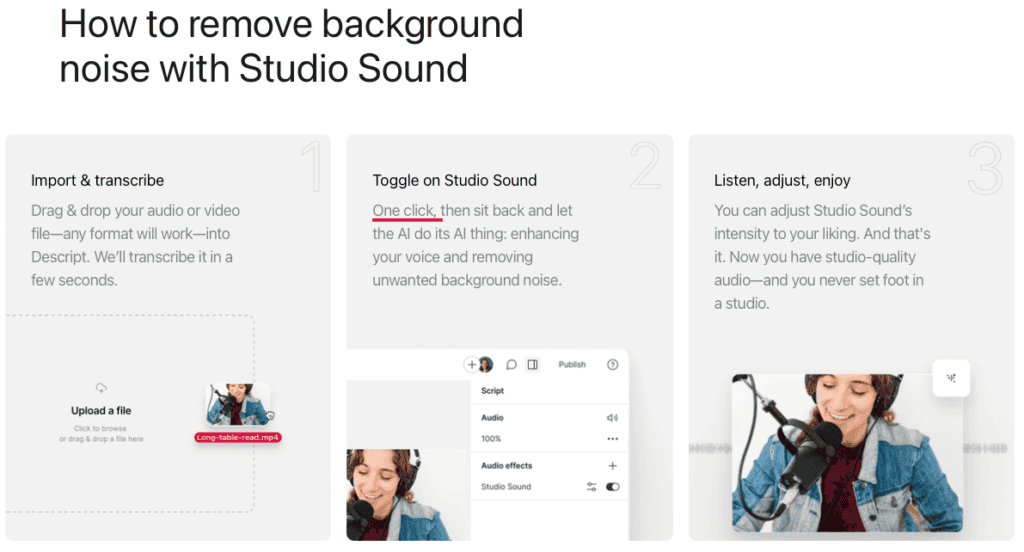
Next on the list is Descript. It’s not just an audio editor; it’s a full-blown content creation suite. Its AI-powered Studio Sound feature is particularly impressive for noise reduction.

- Pro: All-in-one solution for audio and video editing
- Con: Steeper learning curve for advanced features
- Price: Free plan available, paid plans from $15/month
Gling.ai
Another tool that’s caught my eye is Gling.ai.

It is primarily known for video editing (I mentioned it in my other blog post about the best AI tools for video editing – you can read here if you want to learn more).
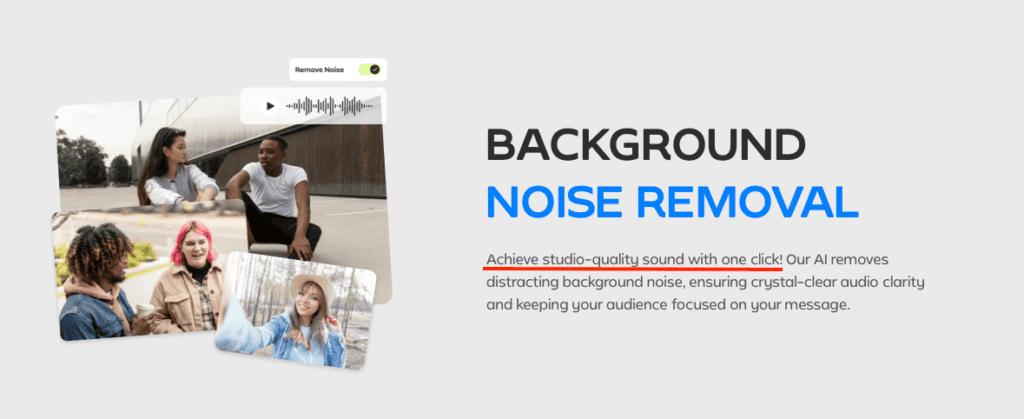
However, don’t sleep on its audio capabilities. Its real-time processing lets you hear the cleaned-up audio instantly, which is pretty cool.
I believe Gling.ai is especially useful for content creators who need to clean up audio quickly without diving deep into complex audio editing software.
- Pro: Real-time audio processing for instant feedback
- Con: Can be resource-intensive for large files
- Price: Choose between a free plan for basic features or paid plans starting at $10/month for more features.
Auphonic
If you’re a podcaster, Auphonic might become your new best friend.
I’ve heard great things about its adaptive leveler and intelligent loudness normalization features, which ensure consistent volume across different audio files using advanced machine learning algorithms.

- Pro: Excellent for podcast production with multi-track recordings
- Con: Aggressive noise reduction can sometimes affect voice quality
- Price: Free plan (2 hours/month), paid plans from $11/month
Supertone Clear
Here’s an AI audio enhancement tool that’s been making waves in the audio editing community – Supertone Clear.
This AI-powered audio plugin not only removes background noise but also tackles reverb and enhances voice quality using state-of-the-art deep learning models.
I saw a comparison video that pitted Supertone Clear against some industry-standard noise suppression techniques, and I’ve got to say, it held its own impressively. The interface is simple and intuitive, which is always a plus when dealing with complex audio processing tasks.
- Pro: Exceptional noise removal with voice enhancement
- Con: Aggressive settings may cause voice distortion
- Price: $99 (but watch for occasional discounts)
XOUND
Another tool worth checking out is XOUND.
What caught my attention about this one is its ability to adapt to different recording environments and noise profiles using advanced machine learning algorithms. This means it can provide more nuanced noise suppression compared to some traditional methods.
For my YouTube channel, where I sometimes record in less-than-ideal acoustic environments, XOUND has been a valuable tool. It’s particularly good at eliminating those pesky hums and hisses that can creep into recordings, greatly improving the overall video production quality.
- Pro: Adapts well to various noise environments
- Con: Premium features can hit the wallet hard
- Price: Free tier available, premium plans with more features start from $11.99/month (But they do offer a single use pricing plan too at $4.99)
CleanVoice AI
Last but certainly not least, we have CleanVoice AI. This smart noise reduction software goes beyond just noise cancellation – it can also automatically remove filler words like “um” and “uh” using sophisticated natural language processing, which is a huge time-saver in post-production.
I think what sets CleanVoice AI apart is its focus on speech enhancement using deep learning. For those of us who primarily create talking head videos or podcasts and want to achieve professional video audio quality, this specialized approach to AI audio enhancement can be incredibly valuable.
- Pro: Removes filler words automatically
- Con: Subscription model might be pricey for individuals
- Price: Free trial available. Otherwise you can opt for Pay as You Go plans or various subscription plans (start from $11/month)
How to Remove Background Noise from Video Using AI: A Step-by-Step Guide

Okay, so you now know there are some great tools out there to boost the sound quality of your videos and podcasts. But there are definitely a few nitty-gritty details you should get familiar with.
Let me break it down for you with a quick step-by-step guide on how to use AI audio enhancement tools and smart filtering for reducing background noise and enhancing your audio!
Step 1: Choose the Right Tool for Your Needs
Before diving in, it’s important to pick the right tool for your specific needs. If you’re looking for a quick, free fix, Adobe Podcast Enhance Speech might be your best bet.
For more comprehensive editing, Descript or Auphonic are fantastic choices, especially if you’re dealing with multiple tracks or need to polish your audio further.
I personally like Descript when I’m working on a project that requires both video and audio editing, but Auphonic might be better for podcast episodes where you want everything to sound balanced and professional. (By the way, to learn more about how to use AI for video editing, check out this post)
Step 2: Upload Your Audio or Video File
Once you’ve chosen your tool, the next step is to upload your file. Most of these AI tools have a very straightforward interface. Let’s take Adobe Podcast Enhance Speech as an example:
- Go to the Adobe Podcast Enhance website.
- Click on “Upload” and select the file you want to clean up.
- The AI will automatically start processing your file to remove background noise.
If you’re using Descript:
- Open Descript and start a new project. (You can try it for free)
- Drag and drop your video or audio file into the workspace.
- Apply the “Studio Sound” effect to clean up the noise.
Step 3: Adjust the Noise Reduction Settings
Now, here’s where you can tailor the results to your liking. Most tools allow you to adjust the intensity of noise reduction. In Adobe Podcast Enhance, it’s a simple slider that you can move to increase or decrease the effect.
I find that pushing the slider too far can sometimes make the audio sound a bit unnatural—almost robotic—so start small and listen closely.
In Descript, the Studio Sound feature doesn’t require much tweaking, but if you feel the audio is too processed, you can dial it back by reducing the effect’s intensity in the settings. For Auphonic, the AI does a lot of the heavy lifting automatically, but you can still fine-tune aspects like loudness normalization and adaptive leveling if you’re dealing with particularly tricky audio.
Step 4: Preview and Export Your Cleaned Audio
Before you hit “export,” always preview your cleaned audio. Listen to it through headphones, and, if possible, on different devices to ensure it sounds good across the board.
I remember one time I was in a rush and skipped this step—big mistake. I ended up with audio that sounded great on my studio monitors but was way too harsh on laptop speakers.
When you’re satisfied, go ahead and export your file. All these tools make this step easy. Just choose your preferred format (MP3, WAV, etc.), and the tool will handle the rest.
Step 5: Review and Make Final Edits
After exporting, give your content one last review. If you’re using a tool like Descript, you might want to fine-tune the transcript or add captions before uploading. For tools like Supertone Clear or XOUND, double-check that the noise removal hasn’t affected the clarity of your voice—sometimes, aggressive settings can introduce distortion.
Personal Tips:
- Experiment with Different Tools: What works for one project might not work for another.
- Don’t Overdo It: It’s tempting to max out the noise reduction, but less is often more. I’ve learned that subtle adjustments can yield a more natural sound.
- Backup Your Originals: Always keep an unedited version of your file. Sometimes, after applying effects, you might want to revert to the original and start fresh.
Best Practices for High-Quality Audio in Your Videos
Using AI to eliminate background noise is great, but let’s not forget that the foundation of good audio starts at the recording stage. Here are some tips to help you capture clean, high-quality audio right from the start.
1. Choosing the Right Microphone
First things first—choose a good microphone. If you’re serious about producing professional-quality content, investing in a decent microphone is non-negotiable.
Built-in mics on cameras and smartphones can work in a pinch, but they often pick up a lot of ambient noise.
For most situations, a shotgun mic is great for focused sound in controlled spaces, while a lavalier mic is perfect for interviews or when you’re on the move.
If you’re recording a podcast or voiceover, consider a USB or XLR condenser microphone. These mics are designed to capture detailed and rich audio, and when paired with a pop filter and shock mount, they can significantly reduce unwanted noise from plosives or vibrations.
2. Monitoring Audio Levels
Monitoring your audio levels during filming is crucial.
I can’t tell you how many times I’ve been saved by keeping an eye on my audio levels in real-time. If your camera or recording device has a headphone jack, use it! Listening through headphones lets you catch issues like clipping, background noise, or mic interference before it’s too late.
Another tip is to keep your audio levels in check. Aim for a consistent level that peaks between -12dB and -6dB. This range gives you a safe buffer to avoid distortion while ensuring your audio isn’t too quiet. If your recording device allows for it, set up a limiter to prevent sudden loud noises from peaking.
3. Ensuring Audio Consistency
Have you ever watched a video and been jolted by the sudden change in audio quality between clips?
Yes. It is important to keep the same audio quality in all your clips. To maintain consistency, use the same microphone setup throughout your recording session. If you need to record on different days or locations, take a few seconds to match your audio settings and environment as closely as possible.
If you’re editing multiple audio sources together, like interviews from different locations, consider using an equalizer to match the tone and quality of each audio track. This will make your video sound more polished and professional.
4. Noise Suppression Techniques
Even with the best setup, some noise is inevitable. For these situations, basic noise suppression techniques can make a huge difference. Start by using a noise gate during recording, which only allows audio above a certain threshold to be recorded. This way, background noise is less likely to sneak in when you’re not speaking.
5. Optimizing Your Recording Environment
Lastly, consider your recording environment. Ideally, you want a space that’s quiet and free of reflective surfaces that can cause echo. If you don’t have access to a soundproof room, there are still ways to improve your environment.
Adding soft furnishings like carpets, curtains, or even DIY foam panels can help dampen sound reflections. When I’m pressed for time, I’ve even thrown a blanket over my recording space to minimize reverb.
Future Trends in AI Audio Enhancement
AI-powered audio tools are already impressive, but the future holds even more exciting possibilities. Here’s a glimpse into what’s on the horizon.
Emerging Technologies in Noise Reduction
The next wave of AI audio tools will go beyond just removing noise—they’ll likely use generative AI to recreate and enhance audio. Imagine a tool that not only eliminates unwanted sounds but also fills in gaps with contextually appropriate audio, making it sound as if the noise was never there. This could revolutionize how we think about audio editing.
Improvements in AI Accuracy and Efficiency
We can also expect AI to become more accurate and efficient. Current tools sometimes struggle with complex noise or subtle background sounds, but future versions will likely handle these scenarios with greater precision. Expect quicker processing times and real-time enhancements, bringing studio-quality sound to your projects instantly, even during live broadcasts. Companies like Nvidia are already paving the way for these advancements in broadcast technology.
Integration of AI Audio Tools with Video Editing Software
In the near future, AI audio tools will be deeper integrated into video editing software. You’ll be able to clean up audio, adjust levels, and enhance sound directly within your video timeline. This integration will streamline workflows and ensure perfect synchronization between your audio and video edits.

Final Thoughts
In 2024, AI background noise removal tools are no longer just for the pros—they’re for everyone wanting to elevate their video and audio game.
Whether you’re recording YouTube videos, podcasts, or any content, the right mic and some advanced AI noise removal software can make a huge difference.
I’ve found that combining solid recording practices with advanced tech really sets you up for success (and it’s easier than you think).
I can’t wait to see how these advancements will reshape storytelling and elevate the quality of content creators.
It’s no-doubt an exciting time for all of us creators!


