5 Ways to Improve Video Quality with AI for YouTube Creators
Creating high-quality YouTube videos can feel like trying to cook a gourmet meal in a microwave. You’ve got the ingredients – your ideas, your personality, your passion.
But turning that into a polished video? That’s where things get tricky.
Let’s face it: professional-looking lighting, crisp audio, smooth edits – these things can make you want to pull your hair out.
And don’t even get me started on color grading or stabilizing shaky footage. It’s enough to make you wonder if you need a Hollywood budget to compete.
But what if I told you, that you could become a video pro overnight and improve video quality with AI?
Get this – a whopping 87% of people say they trust brands more when their videos look professional. Talk about pressure to make your content shine!
In this post, we’re going to explore 5 ways AI video enhancement can help turn your video-making headaches into “how did I do that?” moments. From AI upscaling tools that sharpen your footage to AI for video editing that simplifies smooth cuts, we’ve got you covered.
Intrigued? Let’s roll up our sleeves and get into it!
1. Improve Video Resolution with AI
You’re likely familiar with the challenge of having great video ideas yet struggling with less-than-ideal equipment.
The good news is that you don’t need top-dollar cameras to produce top-quality videos.
Thanks to advancements in AI technology, there are tools designed to enhance video resolution and overall quality. These tools can turn your existing footage into something that looks polished and professional, without requiring you to break the bank.
Limitations of traditional upscaling
I remember the first time I tried to enhance my footage the old-school way. You know, that moment when you adjust the resolution slider in your editing software, hope for the best, and end up with a pixelated mess. It was similar to trying to make a gourmet milkshake by just adding more ice to my homemade smoothie. It doesn’t quite work that way.
The problem with traditional video upscaling methods is their fundamental limitation when creating new, accurate information. When you increase the resolution of a video using these techniques, the software tries to fill in gaps that aren’t in the original footage.
These methods usually use basic interpolation algorithms, which guess what should go in the spaces between existing pixels. While they might work for small adjustments, they struggle when you need to upscale significantly.
The results often include a range of visual artifacts that detract from the viewing experience:
- Pixelation: The image becomes noticeably blocky, especially in areas with fine details.
- Blurriness: As the software struggles to create new information, it often results in a loss of sharpness and clarity.
- Jagged edges: Straight lines and curves can become stepped or zigzagged, particularly noticeable in diagonal lines.
- Loss of texture: Fine textures in the original footage can become smeared or completely lost.
- Color banding: Smooth color gradients may develop visible “steps” or bands.
These issues become more pronounced the more you try to upscale. It’s a bit like trying to zoom in on a low-resolution photo – there’s only so much detail you can extract before the image quality starts to degrade significantly.
How AI enhances resolution
Enter AI upscaling – it’s like giving your footage a pair of smart glasses. Instead of just stretching pixels, AI learns what high-resolution images should look like.
These AI models are trained on countless pairs of low and high-resolution images. They learn patterns and details that make images look sharp and clear. When you feed them your low-res video, they don’t just guess – they apply what they’ve learned to fill in those missing details intelligently.
The cool part is that AI can recognize objects and textures. It knows what skin, fabric, or tree bark should look like in high definition. So when it upscales your footage, it’s not just making things bigger – it’s actually adding plausible details that weren’t there before.
This approach helps avoid those classic upscaling pitfalls. Instead of blocky pixels, you get smoother transitions. Rather than blurry messes, you see crisp edges and fine textures.
Top AI tools for better resolution
Now, if you’re looking to experience the capabilities of AI, there are some solid options out there. Here’s a rundown of some top contenders:
- Topaz Video Enhance AI: This is a powerhouse for video upscaling. It offers a range of AI models tailored for different types of footage. Whether you’re working with old SD content or more recent 1080p material, it’s got you covered.
- DVDFab Video Enhancer AI: Don’t let the name fool you – it’s not just for DVDs. This tool uses deep learning to upscale and enhance various video formats. It’s particularly good at handling noise and compression artifacts.
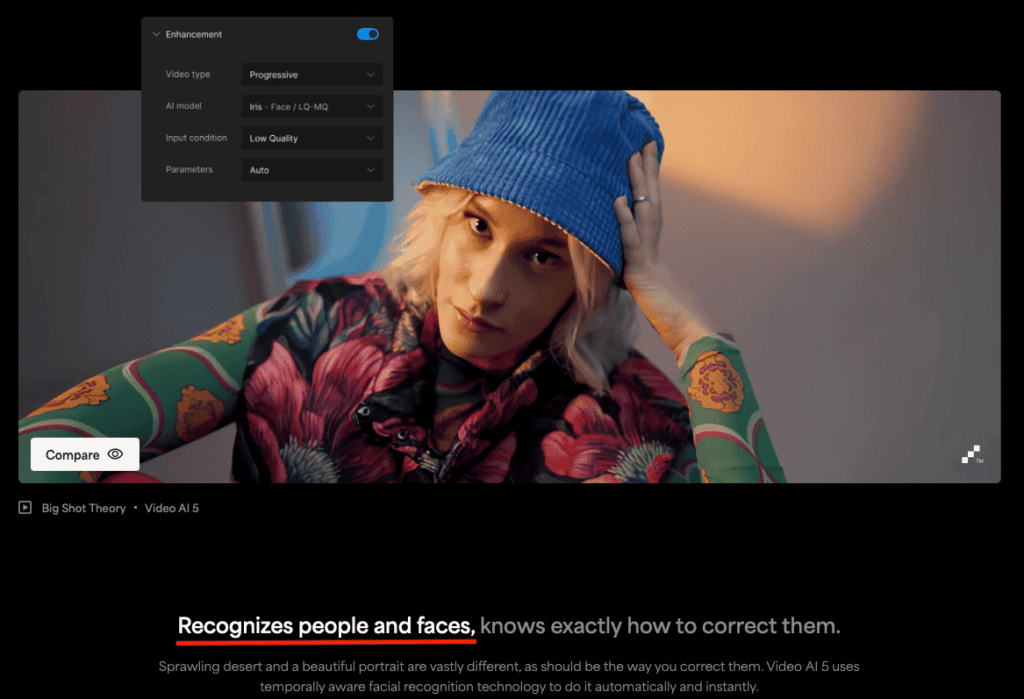
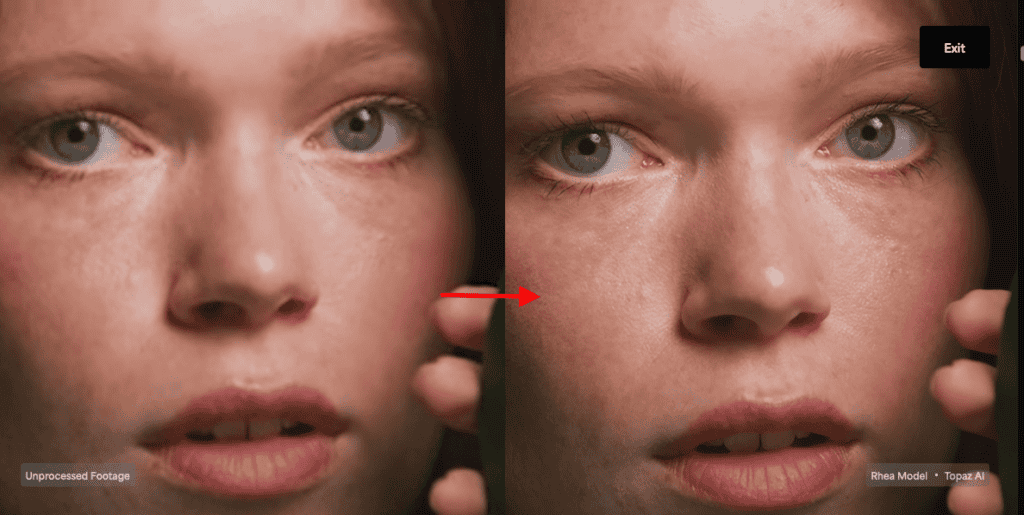
Before and after examples
This is an example on the Topaz AI Video Enhancer website. You can see clearly that on the right, the video quality is a lot clearer.
Tips for using AI resolution tools
Now, before you go AI-crazy on all your footage, here are a few tips to get the most out of AI upscaling tools:
- Start with quality source material: AI upscaling works best when it has a decent foundation. Use the highest quality original footage you can get your hands on.
- Experiment with settings: Don’t just hit ‘enhance’ and hope for the best. Each project is unique, so take the time to play around with different parameters. You might be surprised at how much difference a few tweaks can make.
- Use it strategically: Not every frame needs the AI treatment. Focus on the parts of your video where enhanced resolution will really make a difference – like close-ups, detailed shots, or visually complex scenes.
Now that we’ve got your video looking sharp enough to cut glass, let’s talk about something that can make or break your content – audio quality.
2. Clean Up Audio with AI
Ok. Let’s talk audio cleanup – because crystal-clear sound is crucial for engaging content. AI-powered audio enhancement tools can significantly improve your recordings by reducing background noise, enhancing voice clarity, and balancing audio levels.
These tools are particularly useful for salvaging footage with unexpected audio issues, like when I once had to remove persistent dog barking from an entire tutorial.
While they’re not a substitute for good recording practices, they can significantly enhance your audio during post-production.
Common audio issues
Unless you’re recording in a professional sound booth, you’re going to run into audio issues. Some of the most common culprits include:
- Background noise (traffic, air conditioning, or disturbances from neighbors)
- Echo and reverb (common issues in untreated rooms)
- Inconsistent volume levels (where audio fluctuates between whispers and louder segments)
- Microphone hiss or static (similar to visual grain in video)
How AI reduces noise
AI noise reduction works by intelligently separating your intended audio from background interference, ensuring that the focus remains on what truly matters in your recording. It analyzes your recording, creates a detailed noise profile, and then carefully filters out the unwanted sounds while preserving the quality of your main audio.
Best AI audio enhancement tools
After trying what feels like every audio tool under the sun, here are two AI-powered gems that have become my go-to solutions:
- Adobe Podcast: Don’t let the name fool you – this tool is great for more than just podcasts. Its AI-powered noise reduction is remarkably effective, transforming echo-y, noisy recordings into crisp, clear audio. Plus, it’s surprisingly user-friendly, even if you’re not an Adobe pro.
- Krisp: What I love is its real-time capability, which means you can use it during live streams or video calls too.
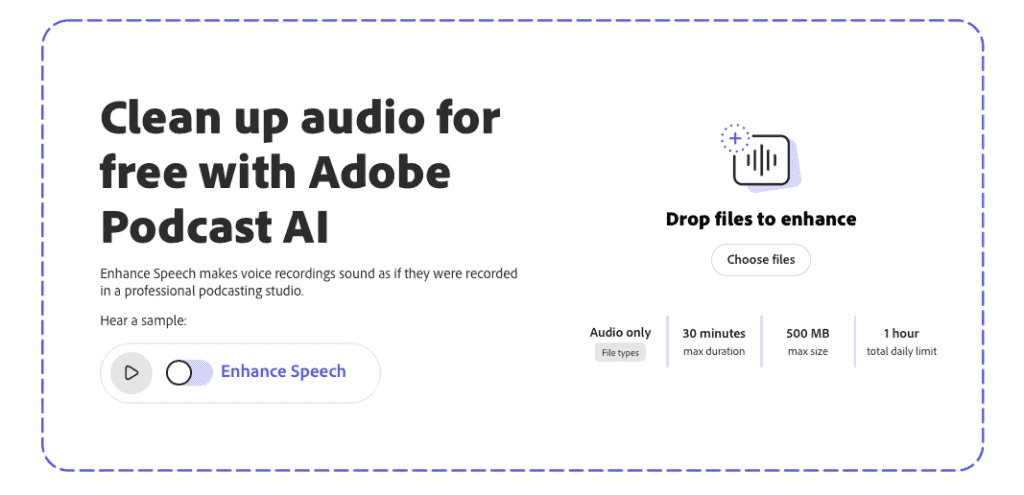
Both tools have helped me turn potential audio disasters into polished, professional-sounding content. They’re proof that sometimes the most powerful tools come in surprisingly accessible packages.
Balancing noise reduction and natural sound
Let me tell you about a mistake I made when I first started using AI for audio cleanup. I was so excited about the technology that I went overboard, cranking up every setting to the max. The result? My voice sounded like a robot trying to do an impression of me. Not exactly what I was going for.
Here’s what I learned: when it comes to AI audio tools, less is often more.
Start with small adjustments and listen carefully. You want to reduce background noise, sure, but not at the expense of your natural voice. It’s all about finding that sweet spot where your audio sounds clean but still authentic.
Don’t stress about making it perfect. A bit of room tone can actually make your content feel more engaging. Get this balance right, and your audience will focus on what you’re saying, not how it sounds.
Next up, we’ll dive into AI color grading. Trust me, this is where the magic really happens.
3. Enhance Color Grading with AI
I’ll never forget when I truly understood the power of color grading. I’d just finished editing what I thought was a decent reel of some local events.
The footage was sharp and the audio was clean, but something felt off.
It looked a bit flat and dull.
On a whim, I played around with the colors. Suddenly, my footage transformed. The outdoor scenes popped, the indoor shots looked warm and inviting, and even the crowds seemed more lively and engaged.
This experience showed me how crucial color grading is. It brings out the emotion and atmosphere of your video, turning ordinary footage into something captivating. Even small adjustments to contrast, saturation, and temperature can make a huge difference in how your audience connects with your content.
Importance of color grading
Color grading is a key step in video editing that can really boost your content. It’s about adjusting the colors in your video to create a specific look or mood. Good color grading can make your footage more visually appealing and help convey the right atmosphere for your story. For example, warmer tones might make a scene feel cozy, while cooler tones could create a more serious vibe.
How AI simplifies color grading
AI has made color grading easier and faster, especially for beginners. Instead of manually adjusting lots of settings, AI can analyze your video and suggest color grades based on the style you want. It can also help keep colors consistent across different shots, which used to be tricky and time-consuming.
AI tools for color grading
Here are a couple of AI color grading tools I’ve found really useful:
- Colourlab Ai: This is my go-to when I want to achieve a specific cinematic look. It’s great at analyzing footage and suggesting color grades based on popular film styles. I especially appreciate how it lets me experiment with different moods without starting from scratch each time.
- Fylm.ai: This cloud-based platform has really streamlined my color grading process. What stands out to me is how it balances AI-generated looks with the ability to fine-tune everything.
Techniques for consistent color
Consistency is key when it comes to color grading. Here’s my tried-and-true process:
- Start with a reference: Choose a single clip or image that represents the overall look you’re going for. This becomes your North Star.
- Use AI to analyze your reference: Tools like Colourlab Ai can break down the color properties of your reference and apply them to your footage.
- Create a base grade: Apply the AI-suggested grade to all your footage as a starting point.
- Fine-tune scene by scene: While AI gets you 80% there, don’t be afraid to make manual adjustments for each scene.
Creating and using custom AI LUTs
LUTs (Look-Up Tables) are like Instagram filters on steroids. They’re preset color grades you can apply to your footage with a single click. And with AI, creating custom LUTs is easier than ever.
Here’s how I do it:
- Grade a single clip: Use AI tools to create a look you love on one representative clip.
- Export as a LUT: Most AI color grading tools let you save your grade as a LUT.
- Apply to other footage: Now you can quickly apply this look to other videos, ensuring a consistent style across all your content.
- Fine-tune as needed: LUTs are a starting point. Don’t be afraid to make adjustments to suit each specific video.
With your footage now looking sharp, sounding clear, and bursting with perfectly graded color, you’re well on your way to creating professional-quality content. But we’re not done yet.
Next, we’ll explore how AI can transform the tedious editing process. So get ready to say goodbye to countless hours of manual cuts…
4. Make Editing Easier with AI
Alright, let’s talk about the part of video creation that used to make me want to throw my computer out the window – video editing. But trust me, with AI in your corner, you’re going to become much more comfortable with this process.
Challenges of traditional editing
Traditional video editing can be a real test of patience. I’ve spent countless hours hunched over my computer, squinting at timelines and fiddling with countless settings. Here are some common challenges:
- Footage organization: Managing and sifting through large amounts of raw footage to find the best shots.
- Technical limitations: Dealing with long render times and export processes, especially for complex projects.
- Version control: Keeping track of multiple edits, revisions, and client feedback efficiently.
- Audio synchronization: Aligning audio precisely, particularly in multi-camera setups.
- Repetitive tasks: Handling time-consuming, repetitive editing processes like cutting out silences or creating lower thirds.
It’s enough to make anyone consider a career change to something less stressful, like lion taming.
AI tools that assist with editing
Now, with AI entering the picture, some of these pain points are becoming easier to manage. These tools have significantly improved my editing workflow:
- Gling AI: This tool has greatly simplified my content creation process. It automatically detects and removes silences, ums, and filler words from my footage. What used to take hours of meticulous editing now happens in minutes. I find it particularly useful for interview footage or talking-head videos.
- CapCut: I was initially skeptical about mobile editing apps, but CapCut’s AI features have really impressed me. Its automatic subtitle generation and voice-to-text capabilities have saved me considerable time on social media content. The AI-powered effects and transitions also help me create polished videos quickly, even when I’m working on the go.
- Runway ML: This AI-powered creative suite has expanded my editing possibilities. Its ability to remove objects from video, generate B-roll footage, and even extend clips using AI has opened up new creative avenues. I’m particularly impressed by the text-to-video feature, which allows me to generate custom footage based on text prompts.
Now that we’ve streamlined our editing process, let’s dive into the world of visual effects. This is where we can really make our videos pop and stand out from the crowd.
5. Boost Visual Effects with AI
In today’s visually saturated world, high-quality effects can make or break your content. I’ve learned that viewers have become increasingly discerning – they can spot cheap effects from a mile away.
Whether you’re creating a YouTube video or a short film, polished visual effects can elevate your storytelling and keep your audience engaged.
They can transport viewers to new worlds, visualize complex concepts, or simply add that extra wow factor to your footage.
How AI simplifies VFX creation
AI has really transformed the way I approach visual effects. What used to require extensive technical knowledge and hours of painstaking work can now be achieved much more quickly and easily.
AI-powered tools can automatically track objects, create realistic simulations, and even generate entire environments from scratch. This has allowed me to experiment with effects I once thought were out of my league.
Popular AI VFX tools
I’ve been playing around with some AI VFX tools that have really streamlined my workflow:
- NVIDIA Canvas: This tool is mind-blowing. You can literally paint a rough sketch, and AI turns it into a photorealistic image. I once used it to create an entire forest scene from a simple doodle, and the results were jaw-dropping.
- Runway ML: This has become my go-to for quick VFX work. Removing objects from footage or creating simple composites is now a breeze. Last week, I cleaned up a cluttered background in minutes – a task that used to eat up hours.
Integrating AI elements into your videos
Creating cool AI graphics is one thing, but integrating them smoothly into your videos is where the magic happens. Here are some tips I’ve learned:
- Match the style: Ensure your AI-generated elements match the overall style of your video. If your footage is gritty and realistic, a cartoonish AI graphic will stick out like a sore thumb.
- Use masks and blending modes: These tools are great for integrating AI elements. I once added a giant robot to a city skyline using masks and blending modes, and it looked seamless.
- Pay attention to lighting: If you’re adding AI-generated elements to real footage, make sure the lighting matches. Even small discrepancies can break the illusion.
- Motion tracking: If you’re adding AI elements to moving footage, use motion tracking to make them follow the camera movement. This simple step can make your effects look 10 times more professional.
The best part about using AI for VFX is that it allows you to iterate quickly. Don’t like how something looks? Change it up in minutes, not hours. This rapid experimentation can lead to some truly creative and unique visual styles that set your content apart.
Final Thoughts
As we wrap up our journey through AI-powered video enhancement, you’re now equipped to transform every aspect of your content. From crystal-clear resolution and pristine audio to professional color grading, streamlined editing, and jaw-dropping visual effects, AI is revolutionizing every aspect of video creation.
With these tools at your fingertips, the only limit is your imagination.
If you’re eager to dive deeper, check out my other posts about removing noises with AI for advanced audio cleanup techniques, AI video editing tools to explore more editing options, and AI video editing 101 for a step-by-step beginner’s guide.
Remember, these AI tools are here to amplify your creativity, not replace it. So keep experimenting, learning, and pushing the boundaries of what’s possible. Your next masterpiece is just waiting to be created.


