How to Create a Notion Time Blocking Planner: A Step-by-Step Guide
Do you wish for more hours in the day to achieve more tasks?
It’s a common struggle most people face.
However, with strategic approaches such as time blocking and time boxing, you can master your schedule. Couple this with Notion, the increasingly popular productivity tool, and you have an efficient system that significantly boosts your productivity and focus.
In this blog post, I’m going to guide you step-by-step in setting up your personalized time blocking planner in Notion.
We’ll set up a time blocking table, schedule tasks, and even link it to Google Calendar for convenience.
So, without any further ado, let’s dive in!
What is Time Blocking
Essentially, time blocking is dividing your day into specific blocks or slots, where each block is dedicated to a particular task or activity. This method offers an effective way to manage your time more efficiently.
Think about one of those busy days when your to-do list seems endless.
With time blocking, instead of juggling multiple tasks simultaneously, you’ll allocate specific time blocks for each task.
For instance, checking emails only from 10-11 am, project work from 11:30-1:30 pm, and so on. Successful entrepreneurs including Elon Musk and Bill Gates have also used this technique effectively. The author of the book “Deep Work”, Cal Newport, also promotes time blocking and even created a time blocking planner.
How to Time Block in Notion
Now that we understand what time blocking is and its benefits, let’s discuss how to actually implement it in Notion – your all in one workspace.
There are two primary methods in Notion for creating your time blocking planner: Simple Tables and Notion Databases.
Simple Tables are essentially just that – simple and straightforward. They provide an easy way to get started with time blocking without too much complexity.
Notion databases are a bit more complex, but the added functionality they provide such as sorting and filtering tasks can be useful for those who require a bit more customization.
In our next sections, I will walk you through detailed step-by-step guides on how to set up both a Simple Table and a Notion Database for time blocking.
Related: Time blocking using Google Calendar
Method 1: Use Notion Tables for Time Blocking
As we mentioned before, tables are easy to use and straightforward. Depending on your needs, this might already be sufficient if you just need to view your daily or weekly time blocking schedule.
Here are four steps to create a time blocking system using simple Notion tables:
Step 1: Sign Up for Notion
If you’re not already using Notion, sign up for a Notion account at notion.so.
Step 2: Create a New Page in Notion
Log in to your Notion account and create a new page. You can choose to create a new workspace or use an existing one.
Step 3: Add a Simple Table & Add Columns
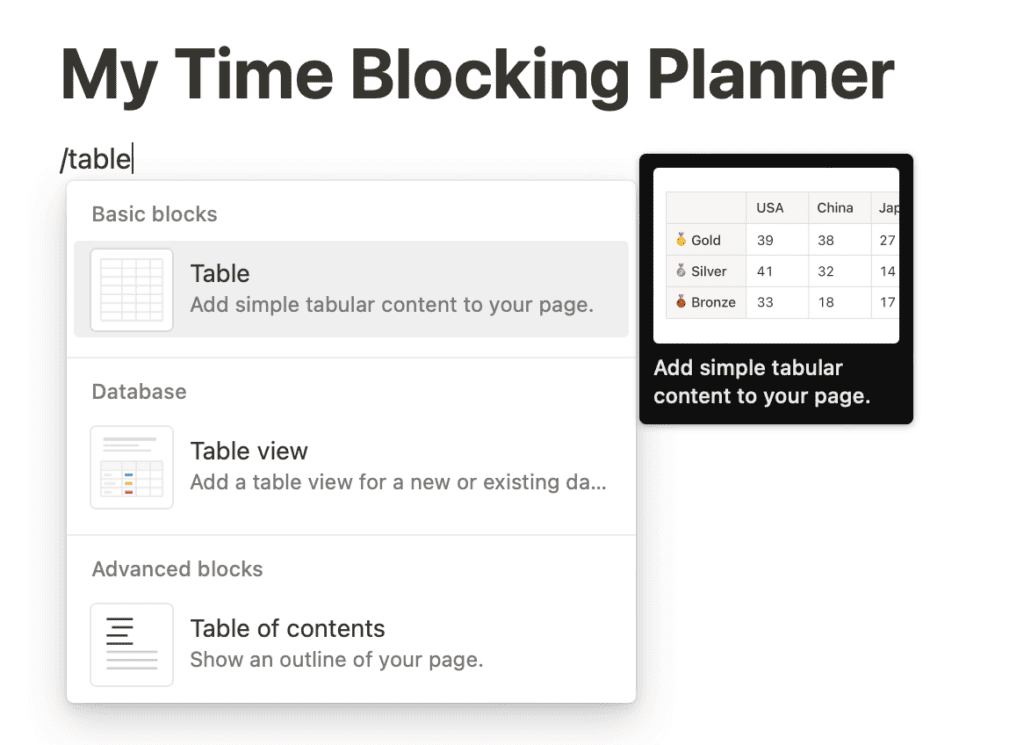
Inside your newly created page, add a simple table to organize your time blocking schedule. To do this:
- Type /table in a blank space.
- Select “Table” from the block options. Note: do NOT select table view if you want to create just a simple table and not a database.
Step 4: Customize and Create Time Blocks
Customize the table by adding columns such as “Task,” “Date,” “Start Time,” “End Time” and other elements you might need.
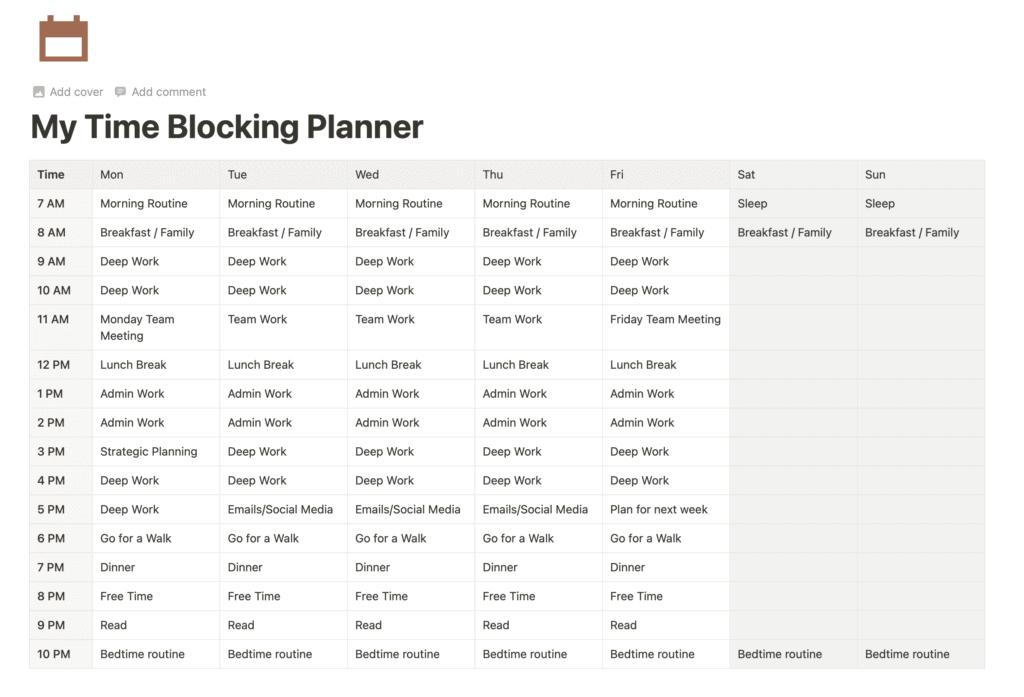
Start populating the table with your time blocks. This is an example of a straightforward table time blocking weekly planner.
Step 5: Organize and Review Your Time Blocks
Once you’ve entered your time blocks, you can easily organize and review your schedule within the simple table. You can manually adjust the blocks as needed, move tasks around, or add additional details.
With these four steps, you’ve created a basic time blocking system using simple Notion tables.
While it may not offer the advanced features of Notion databases and calendar views (you won’t be able to filter or sort), it provides a straightforward way to start managing your time effectively.
Method 2: Use Notion Databases for Time Blocking
Now, let’s establish a basic time blocking template using database in Notion. This will serve as a starting point that you can adapt to suit your requirements.
Step 1: Sign Up for Notion
Like the last method – If you’re not already using Notion, sign up for a Notion account at notion.so.
Step 2: Create a New Page
- Once you’re logged into Notion, create a new page dedicated to your time blocking system. You can do this by selecting a suitable workspace and clicking on “+ New Page”.
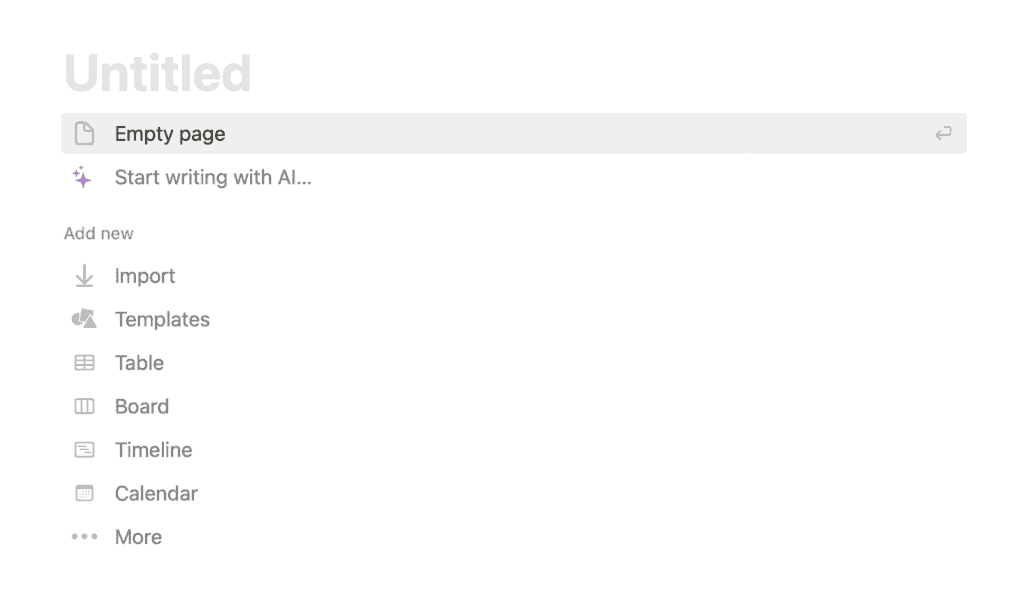
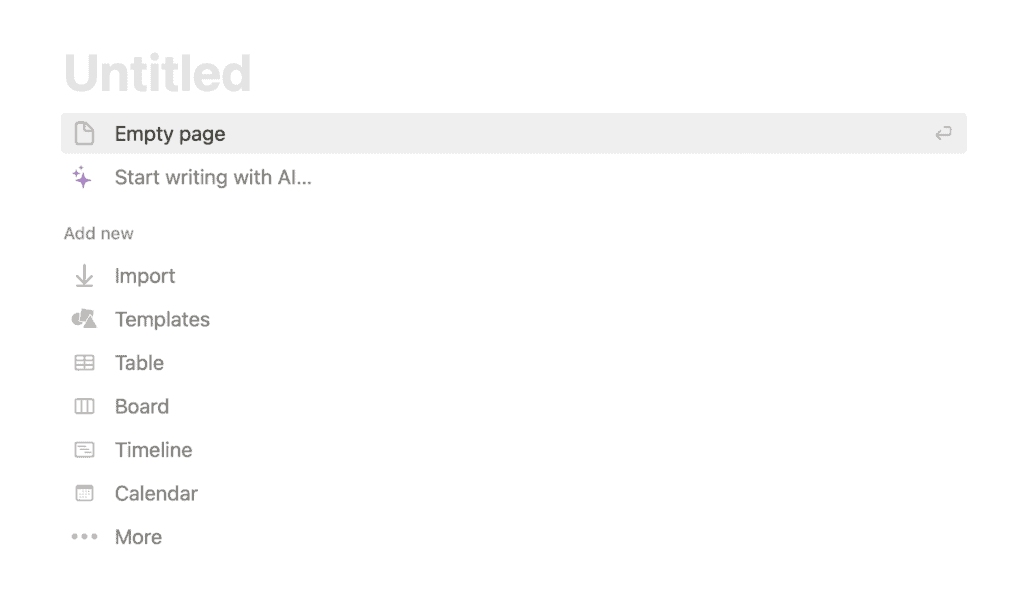
- You can create a title of your page by typing in the “Untitled” space.
- Then, simply click on “Empty Page”.
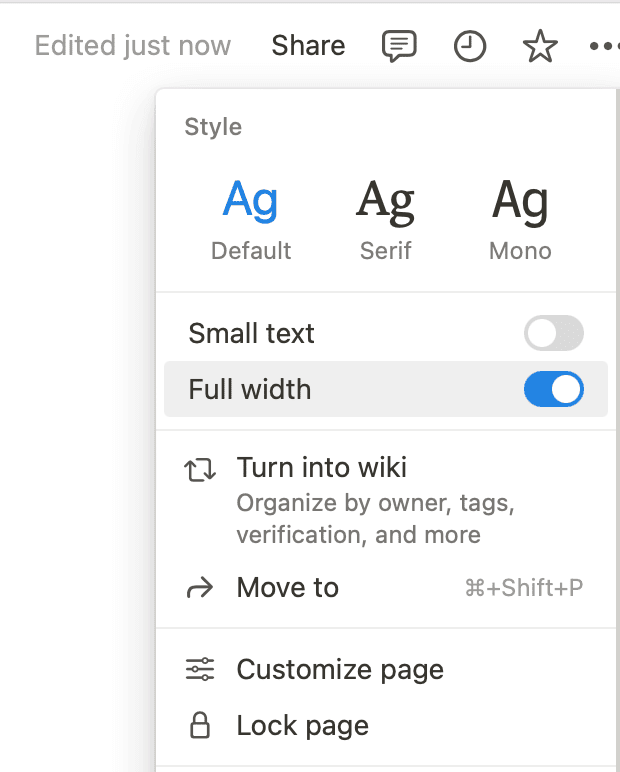
- On the top right corner, you can select “Full width”, or keep it as is as the default center view setting.
Step 3: Create a Table View As Your Time Blocking Database
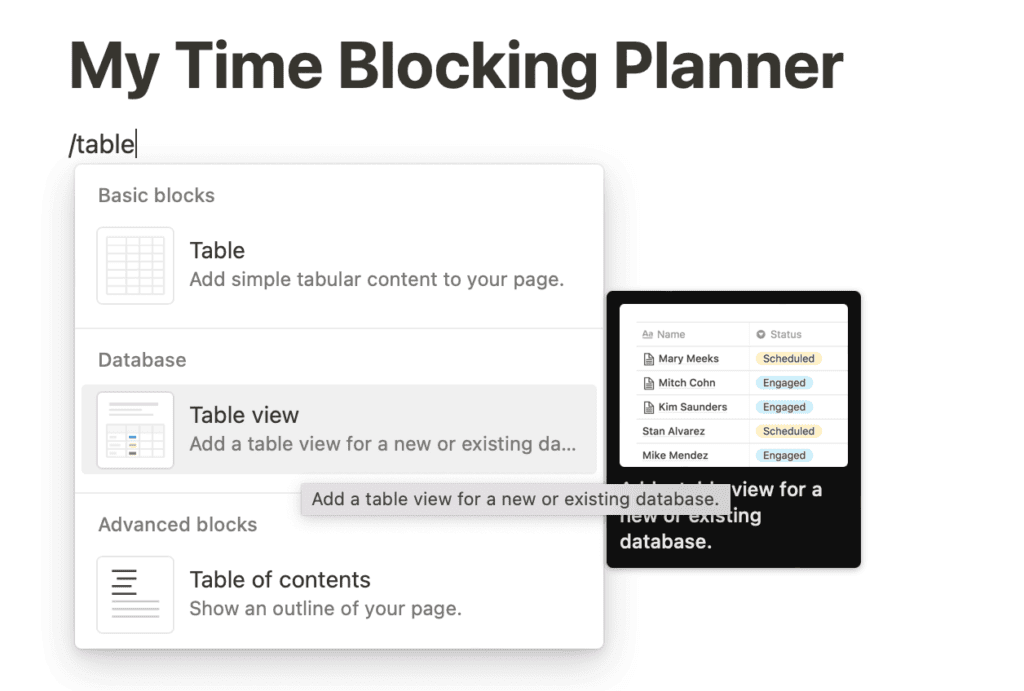
- Add a table database by typing /table and select “Table View”.
- Select “+ New Database”.Step 4: Customize the Database
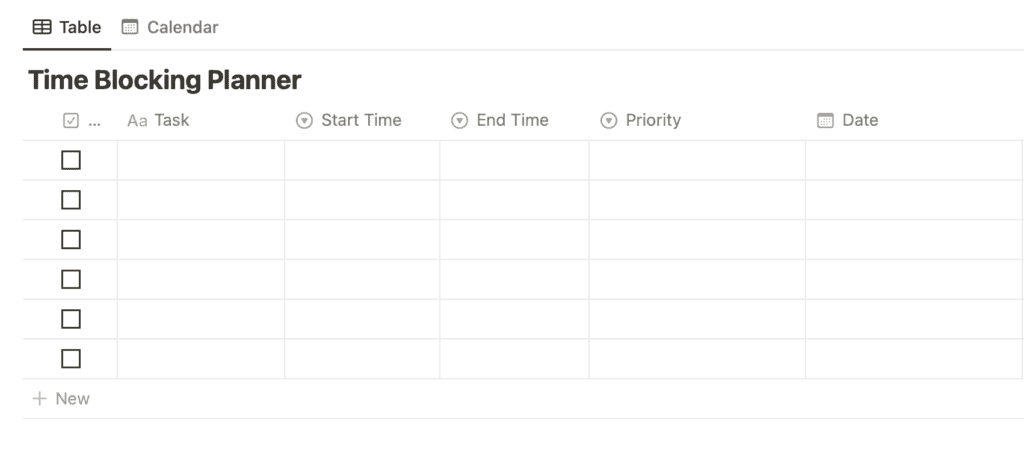
- Add columns such as “Task”, “Start Time,” “End Time,” “Date,” “Priority,” and any additional fields you’d like to add.
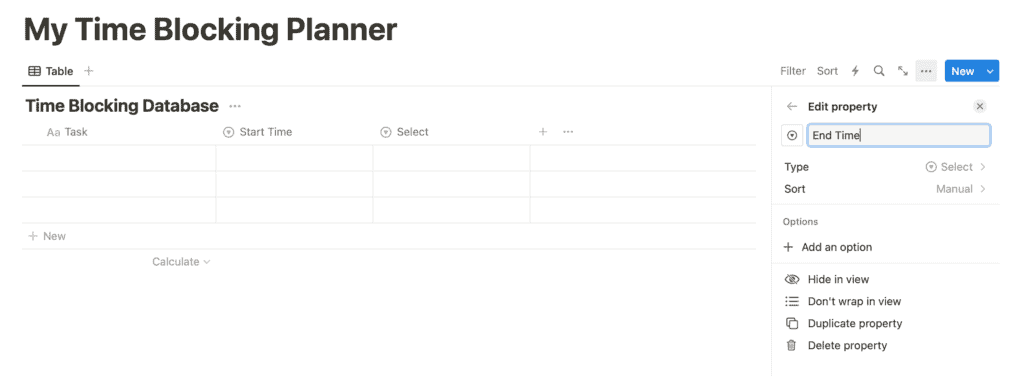
- Note: I am not a big fan of using the Date property to show time, as I think it requires more experience and is not very user friendly. So instead, I use two simple Select properties for Start Time & End Time. Sure, you need to enter the time manually once, but for me, this is much more straightforward and you don’t need any complicated formulas when using this planner.
- I also like to add a checkbox to check off items that are done.
- The finished database looks like this:
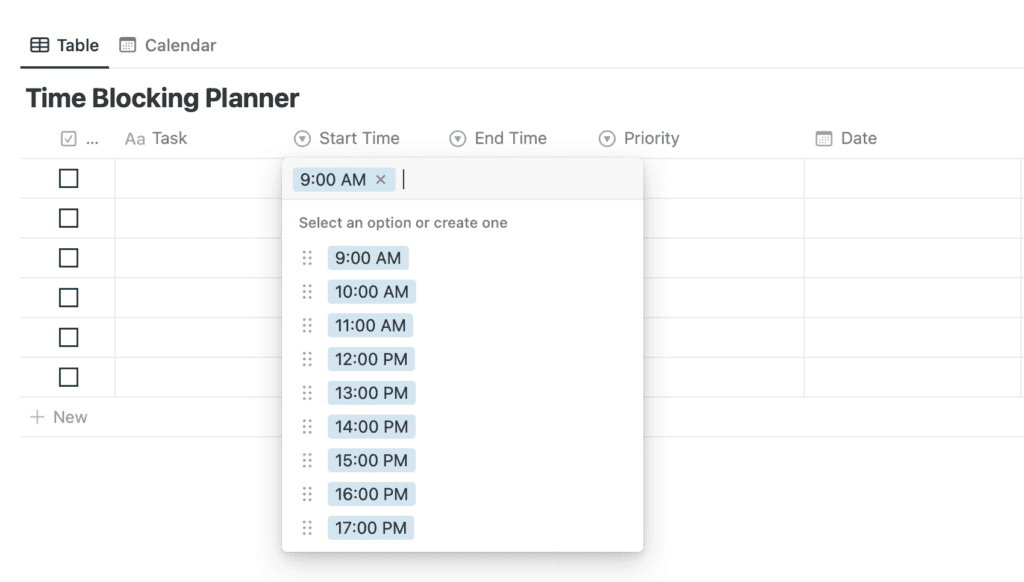
- Then, you can go ahead and type the time periods manually into both “Start Time” and “End Time” properties. You can color code these according to your own preferences. You can also add half-hour blocks such as 9:30AM, 10:30AM…etc. This will help with planning and organization processes in the future.
Step 5: Add Tasks into Your Time Blocks & Sort by Date & Time
- Populate your time blocking database with time blocks.
- Enter the task for each time block.
- Specify the start and end times.
- Fill in priority and date for your time blocks.
- Sort your table by “Date” and “Start Time”. To do this, click on “Sort” and then change the setting to “Date: Ascending” and “Start Time: Ascending”. Here’s an example:

Step 6: Create Calendar Views
You can also create calendar views to visualize your time blocks.
- Add a view to your database and select the “Calendar” view. I like to use the Week View.
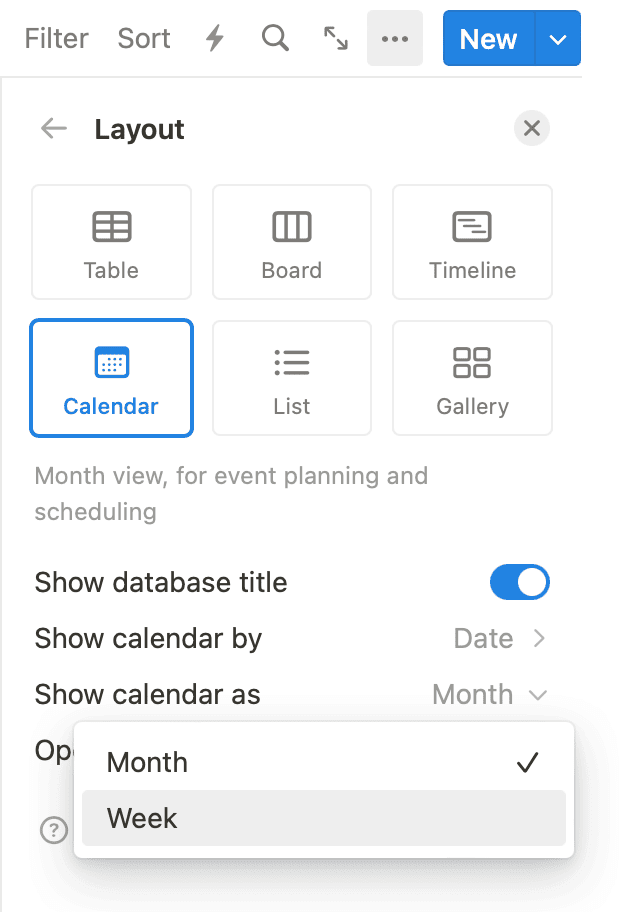
- Choose the properties you want to be visible (click on three dots, then “Properties”) in the calendar view, such as “Start Time”, “End Time” and “Priority”. Here I only make Start Time visible.
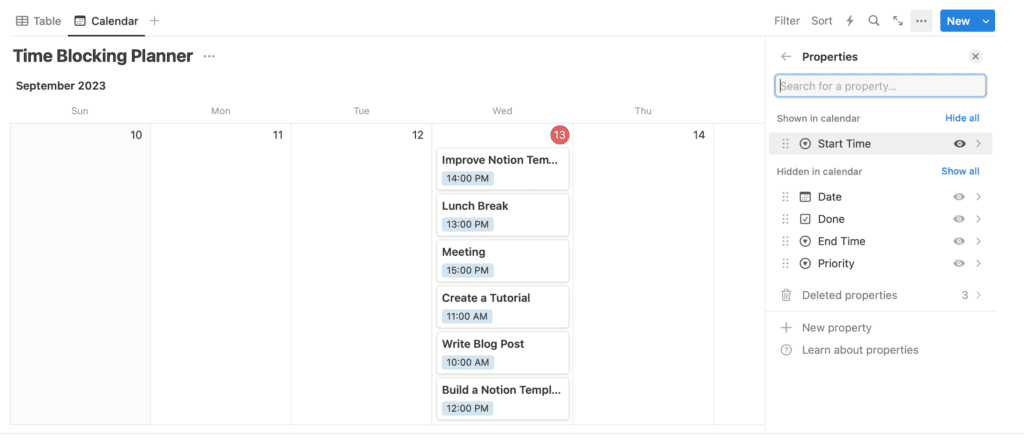
- Then, you can also sort by Start Time. This view helps you easily view your time blocking schedule.
Step 7: Customize and Personalize
- Customize your time blocking planner to suit your preferences.
- Consider color-coding tags for different types of tasks or projects.
- Use filters to sort and view specific time blocks.
Notion Time Blocking Templates
If you’re looking for Notion Time Blocking Templates, you can go to Etsy or Gumroad.
You can type in the keywords to look for the Time Blocking notion templates you’re looking for, such as
- Notion Time Blocking Template
- Daily Time Blocking Notion Template
- Weekly Time Blocking Notion Template
…etc
If you’re looking for more advance features such as linking Google Calendar to your notion table, check out this video.
Final Thoughts
Creating a time blocking system in Notion is not as complex as you might have thought. It involves setting up your workspace and organizing tasks in time blocks on your Notion page.
Here are some key takeaways:
- Time blocks in Notion help you organize tasks and serve as productivity tools.
- You’ve learned to create a user-friendly calendar view.
- Notion’s linked database feature makes task management easier.
- Time blocking in Notion can help you prioritize tasks with ease.
Remember, controlling your own time is the first step towards effective time management.
So, isn’t it about time you started using your very own time blocks in Notion? You might find it to be the productivity boost you’ve been looking for.

